In this document:
Introduction
Simply Schedule Appointments and Webhooks work together to trigger an action in Make (formerly Integromat). Make can integrate with various other apps, such as ActiveCampaign, Salesforce, Zendesk, Evernote, and 1000+ others.
Example Use Cases
- Send a Slack notification to your employees anytime someone books an appointment.
- Add a contact to an ActiveCampaign from booked appointments
- Analyze appointment booked data by integrating with Google Sheets.
Resources
- Make Webhooks documentation
- Make Webhooks integration page
- What are Webhooks and Why Would You Use Them Article
Setting Up A Webhook Trigger in Make
Start by creating an account on Make.
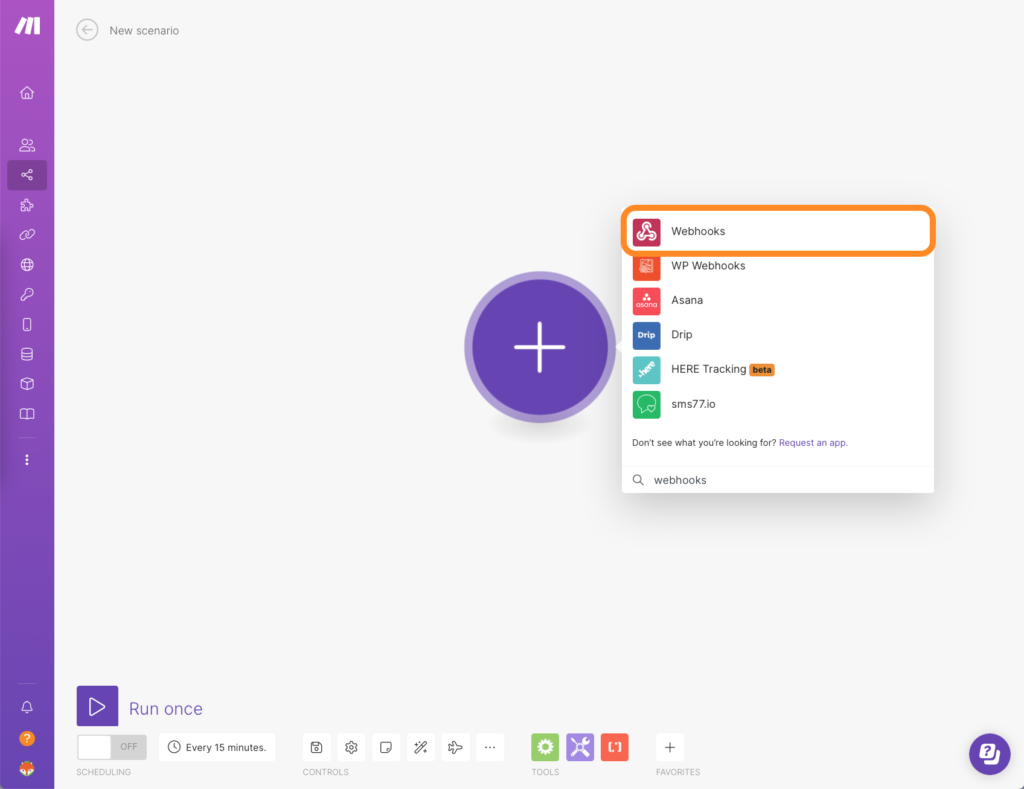
Create a New Scenario
Once logged in, choose the Create a new Scenario option in your Make Dashboard. You’ll be redirected to the Scenario Editor screen. You’ll need to select the Webhook app as the trigger; this is what we’ll use to integrate with Make on our end.
A Scenario is an automated task that you want to be run repeatedly between two online apps.
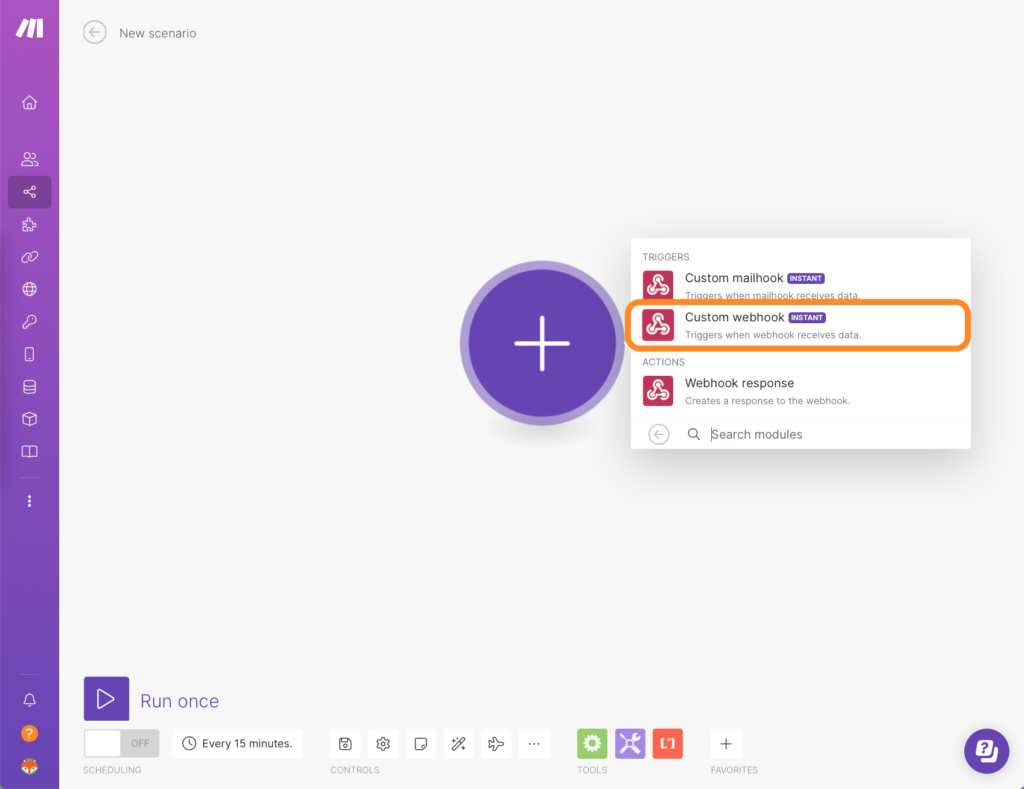
Trigger Option for Webhooks
Make sure to choose Custom webhook. This will allow us to receive the Appointment information automatically and organize the fields we send through the webhook.
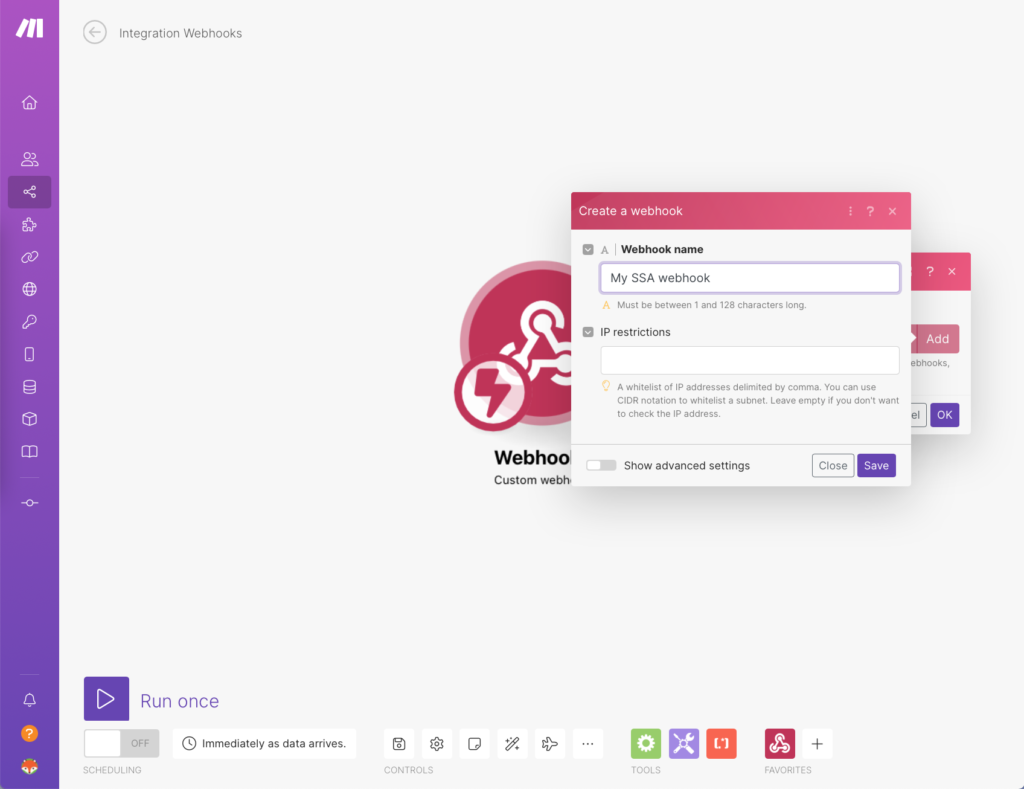
Finish Creating the Webhook Trigger
In the next screen, you’ll need to click on Add. This will open another small window where you can enter a name for the instant trigger module. Click Save.
Returning to the previous screen, copy the Custom Webhook URL. The URL should be something along the lines of https://hook.us1.make.com/...
We’ll be pasting the URL back into SSA in the following steps. But don’t close this window yet! We’re going to come back to this.
Creating a New Webhook in SSA
Go to SSA Settings > Webhooks. Click the toggle to enable this feature, and then click Edit. On the Webhooks screen, click Add a New Webhook.
Configure your Webhook in SSA
Depending on your chosen trigger, the SSA webhooks will automatically notify and send Make Appointment information.
- Name: An optional name to help keep track of your webhooks.
- Token: A unique token you can use to verify the request. To refresh the token, click the refresh arrow on the right-hand side of the token field.
- Trigger: Select which actions should trigger this webhook
- URLs: The URLs where the webhooks will be sent
- Appointment types: Select all appointment types, or select certain appointment types that will trigger the webhook
Pasting the Make Custom Webhook URL into a New SSA Webhook
Under the URLs field, paste the Custom Webhook URL you copied from Make earlier.

Finish Setting Up Webhook Trigger in Make
Go back to your SSA page, and depending on what Trigger you chose for your Webhook, you’ll need to set off that trigger.
For example, if you chose Appointment Booked, go to your Booking Calendar and book a test/fake appointment.
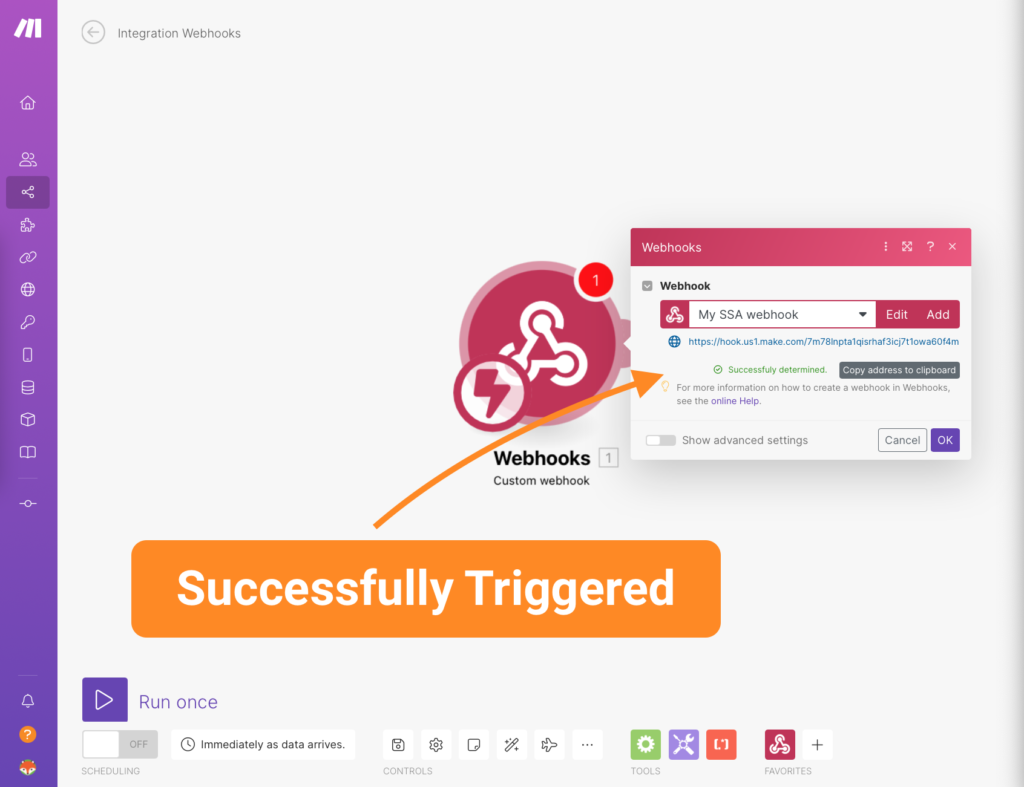
Once you’ve set off the webhook, you’ll want to go back to the Scenario editor and make sure that the test appointment went through. When it says Successfully determined, click OK.
Setting Up Action in Make
Lastly, you’ll want to customize the new action in Make; in this example, I’ll create a new Google Contacts addition whenever someone books an appointment.
Notice that the fields are filled in by Webhooks data that uses SSA Appointment Information. You can customize your actions using any data pulled in from the payload delivered by the webhook.
Fields like the Name, Start Time, Timezone, Email, Custom Fields, etc… can go here.
Make sure to format your data the way you’d like to see it on your other application. For example, use new lines, dashes, commas, colons, etc…
When you’re done, click Run Once to test your new integration.
Double-Check Last Details
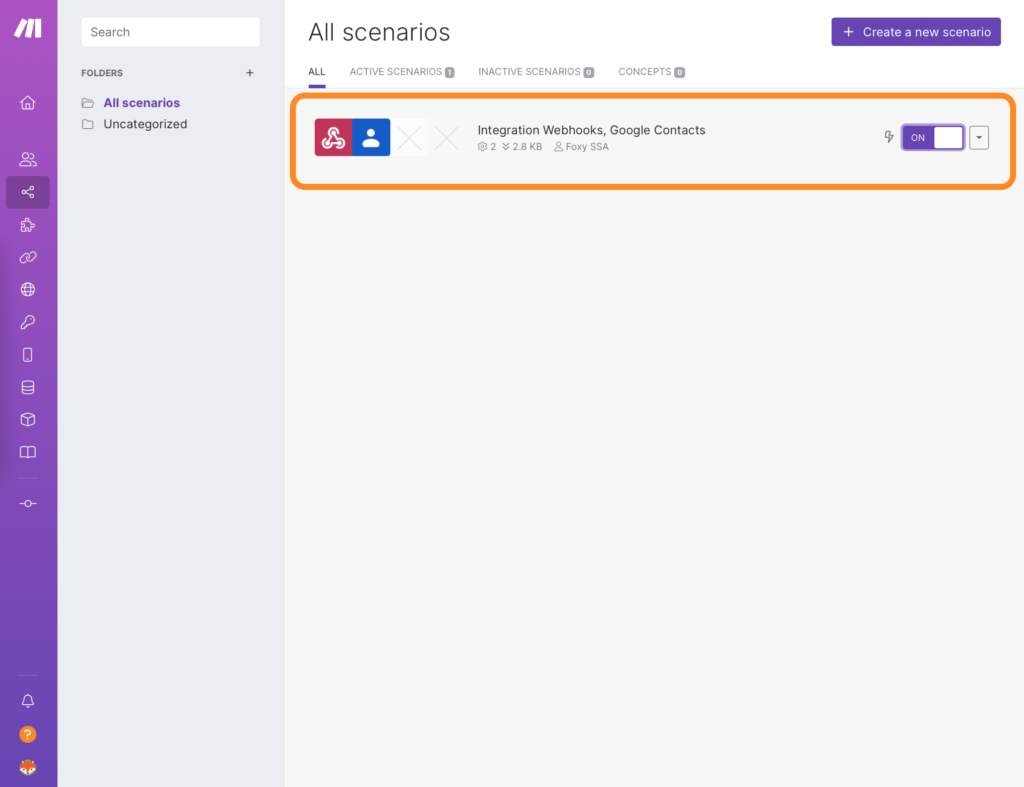
In your Make Dashboard, go to the Scenario page and make sure your new Scenario is ON.
And that’s it! Now you’re ready to connect your Appointments to any other application supported by Webhooks.